Jan
06
2012
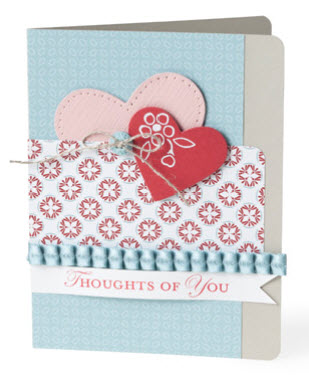
Stamps: Bordering On Romance, Loving Thoughts.
Paper: Blushing Bride, Riding Hood Red, Sahara Sand, Whisper White, Twitterpated Designer Series Paper.
Ink: Riding Hood Red, Versamark.
Accessories: Baja Breeze 3/8″ Pleated Satin Ribbon, Linen Thread, Twitterpated Designer Buttons, White Stampin’ Emboss® Powder, Stampin’ Dimensionals, 3/16″ Corner Punch, Mat Pack, Paper-Piercing Tool, Big Shot, Heart Collection Framelits Die.
Purchase everything you need to create this project by clicking here. Project and image © 2012 Stampin’ Up!®
Dec
13
2011
These are the cards we did in club recently:
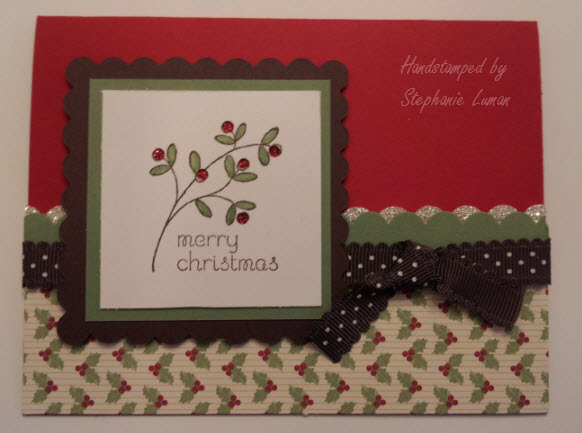
Stamps: Easy Events.
Paper: Whisper White, Wild Wasabi, Chocolate Chip, Real Red, Holly Berry Bouquet Designer Series Paper, Silver Glimmer Paper, Red Glimmer Paper.
Ink: Chocolate Chip, Wild Wasabi.
Accessories: Crop-A-Dile, Big Shot Die-Cutting Machine, Scallop Squares Duo Bigz Die, Chocolate Chip 1/2″ Scallop Dots Ribbon, Scallop Edge Border Punch, Stampin’ Dimensionals.
Inspired by www.stampingschool.com
Use your Crop-A-Dile to punch holes where each berry is and then place a square of Red Glimmer Paper behind the Whisper White square.
————————————————
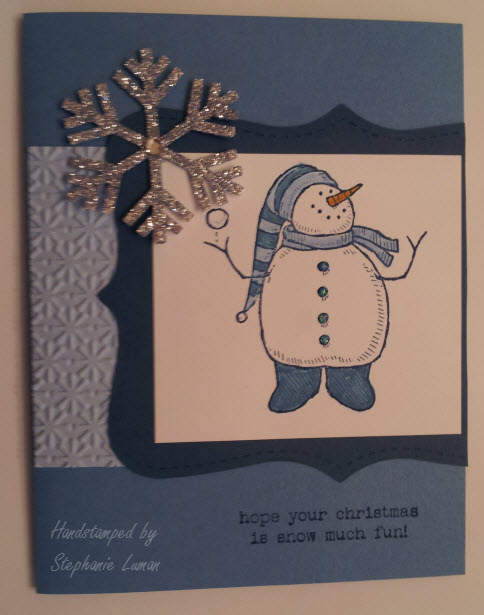
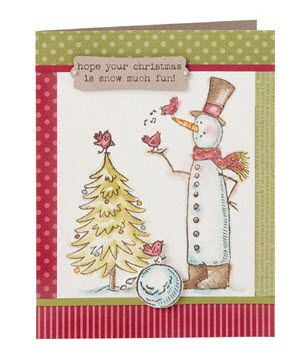
Stamps: Snow Much Fun.
Paper: Whisper White, Not Quite Navy, Bashful Blue, Night Of Navy, Silver Glimmer Paper.
Ink: Bashful Blue, Not Quite Navy, Night Of Navy, Pumpkin Pie.
Accessories: Big Shot Die-Cutting Machine, Top Note Bigz Die, Snow Burst Textured Impressions Embossing Folder, Snowflake Punch, Dazzling Details, Basic Rhinestones, Stampin’ Dimensionals, Heat Tool.
The snowflake is dyed with Bashful Blue reinker. There are several ways to do this but the easiest I have found is just paint the ink directly onto the glimmer paper and heat dry.
To purchase everything you need to create these projects, click here. Images © 2011 Stampin’ Up!®
Dec
05
2011
These line art images make it so easy to customize your creations. Just stamp the images on Watercolor Paper and use the Aqua Painter and your favorite Stampin’ Write Marker colors to watercolor the images and watch them come to life!
See the list of supplies and purchase everything you need to create this project by clicking here. Project and image © 2011 Stampin’ Up!®
Nov
21
2011
Starting today until November 30th you can get incredible discounts–up to 60 percent–on some of your favorite products! In addition, two of our brand-new products will be discounted 20 percent only during the first 24 hours of the sale (November 21, midnight – 11:59 PM [MT]).

Visit my online store to start shopping now!
Nov
18
2011
I love the Beautiful Season stamp set…who doesn’t love adorable little chickadee’s?! It’s also perfect for watercoloring, my favorite technique. The Curly Label punch was used to create a frame for the image and the pearls added the perfect finishing touch!
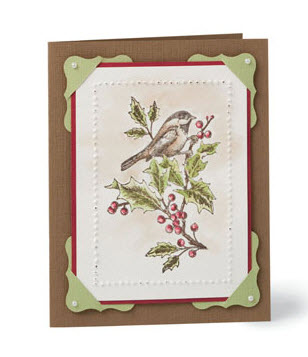
Stamps: Beautiful Season.
Paper: Neutrals Textured Cardstock, Watercolor Paper.
Ink: Basic Gray, Certainly Celery, Cherry Cobbler, Crumb Cake, Soft Suede, Wild Wasabi.
Accessories: Aqua Painter, Curly Label Punch, Mat Pack, Paper-Piercing Tool, Basic Pearls Jewel Accents, Stampin’ Dimensionals.
See the list of supplies and purchase everything you need to create this project by clicking here. Project and image © 2011 Stampin’ Up!®
Nov
11
2011
The curved lines of the Top Note Bigz Die create an added element of surprise on this card. To achieve this look, simply cut out the middle portion of your die cut image and slide the pieces together.
Purchase everything you need to create this project by clicking here. Project and image © 2011 Stampin’ Up!®
Nov
04
2011
Free Big Shot – Extended until Nov. 11th!
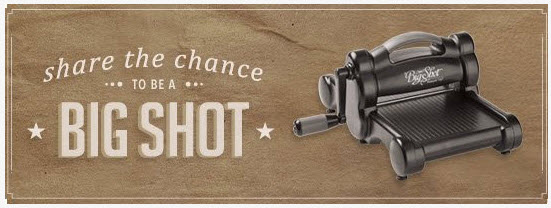
The Big Shot is a big deal! When you purchase the Stampin’ Up! starter kit thru November 11th, you get a FREE Big Shot (or up to $100 in free Stampin’ Up! products). For all the details, visit:
https://www.stampinup.net/esuite/home/sluman/jointhefun
——————————
——————————
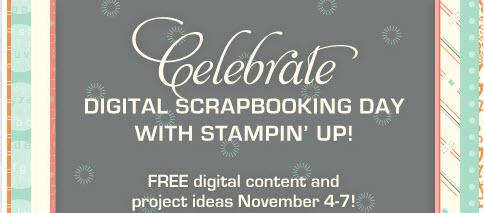
Celebrate Digital Scrapbooking Day with FREE Digital downloads! Stampin’ Up! is celebrating for four-days and kicking it off by offering free downloads to everyone!
Plan to visit MyDigitalStudio.net frequently throughout November 4-7 to view new project ideas. If it’s your first time hearing about My Digital Studio-Stampin’ Up!’s digital design software-you can learn more here.
To get your free downloads, just click here. Enjoy!
Oct
18
2011
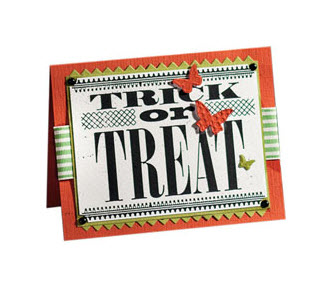
Stamps: Itty Bitty Bits.
Paper: Regals Textured Cardstock, Brights Textured Cardstock, Watercolor Paper.
Ink: Basic Black Craft.
Accessories: Old Olive 1-1/4″ Striped Grosgrain Ribbon; 3/16″ Regals Brads, Stampin’ Dimensionals®; Big Shot™; Beautiful Wings Embosslits Die; Tasteful Trim Bigz™ Die; Trick Or Treat Letterpress Plates.
Purchase everything you need to create this project by clicking here. Project and image © 2011 Stampin’ Up!®
Oct
14
2011
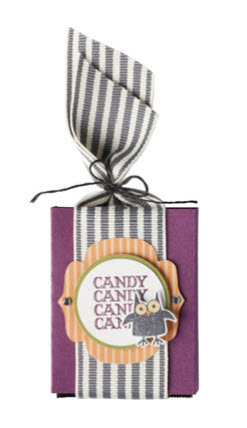
Stamps: Spooky Bits Bingo.
Paper: Old Olive; Rich Razzleberry; In Color Patterns Designer Series Paper.
Ink: Basic Gray; Rich Razzleberry; Peach Parfait; So Saffron.
Accessories: Basic Gray 1-1/4″ Striped Grosgrain Ribbon; Linen Thread (colored gray); Rhinestone Basic Jewels; Stampin’ Dimensionals®; 1-1/4″ Circle Punch; 1-3/8″ Circle Punch; Big Shot™; Matchbox Bigz™ XL Die.
Purchase everything you need to create this project by clicking here. Project and image © 2011 Stampin’ Up!®
Oct
11
2011
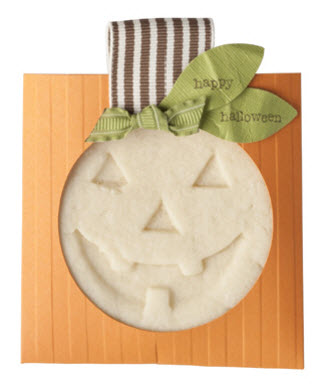
Stamps: Teeny Tiny Wishes, Sweet Pressed Cookie Stamp
Paper: Pumpkin Pie, Lucky Limeade Textured, Note Cards envelope (as a template for the sleeve).
Ink: Soft Suede.
Accessories: Lucky Limeade 3/8″ Ruffled Ribbon; Soft Suede 1-3/8″ Striped Grosgrain ribbon; Stampin Dimensionals®; Circle Scissor® Plus; Blossom Petals Punch; Big Shot™; Stripes Textured Impressions™ Embossing Folder
Purchase everything you need to create this project by clicking here. Project and image © 2011 Stampin’ Up!®